


Mehrangarh Fort, located in Jodhpur in the state of Rajasthan, is a massive fort located on a hill 400 feet above the city. Its walls are up to 36 meters high and 21 meters wide. Inside these imposing thick walls, there are gardens, courthouses, several palaces known for their intricate carvings and expansive courtyards, elaborate balconies, arched galleries, and heavily ornamented private residences. Looking straight down a perpendicular cliff, the famously impregnable fort is an imposing landmark, especially at night, when it's bathed in yellow light.
The approach to the fort is guarded by no fewer than seven huge gates. The first gate, the Victory Gate, was built by Maharaja Man Singh to commemorate his victories over Jaipur and Bikaner armies. Fattehpol (also meaning 'victory') gate was built by Maharaja Ajit Singh to mark the defeat of the Mughals. The palm imprints upon these made by 15 royal satis (Jodhpur queens who burnt themselves on the funeral pyres of their husbands), still attract much attention even today.

Photo credit
Past the gates, the fort-palace takes one's breath away. Across from huge courtyards are the set wings of palatial apartments that have been built over five centuries of bristling history. Today, managed as a museum by the royal trust, only some of the more spectacular palaces of Meharangarh are open to the visitors. These consists of Moti Mahal (Palace of Pearls) with its pierced screen windows overlooking the coronation seat where the Rathore ruler have been ritually anointed to rule; Jhanki Mahal (Palace of Glimpses), from where the royal ladies watched the official proceedings in the courtyard; the royal Darbar Takhat or throne room with its octagonal throne; and the Rang Mahal (Palace of Colors) where the maharaja would play Holi with his wives. Also noteworthy are Sheesh Mahal, Phool Mahal, Umaid Vilas and Maan Vilas.
The various buildings inside the fort now serve as museums which hosts a well preserved collection of musical instruments, palanquins, furniture and cannons on the fort's ramparts.
Mehrangarh Fort was built in the 15th century by Rao Jodha when he shifted his capital from nearby Mandore to Jodhpur. The foundation of this fort was laid on 12th May, 1459 by Jodha himself on a rocky hill six miles south of Mandore. This hill was known as Bhaurcheeria, the mountain of birds. According to legend to build the fort he had to displace the hill's sole human occupant, a hermit called Cheeria Nathji, the lord of birds. Upset at being forced to move Cheeria Nathji cursed Rao Jodha with "Jodha! May your citadel ever suffer a scarcity of water!". Rao Jodha managed to appease the hermit by building a house and a temple in the fort very near the cave the hermit had used for meditation. Jodha then took an extreme measure to ensure that the new site proved propitious; he buried a man alive in the foundations. The man was Rajiya Bambi (Meghwal) and he was promised that in return his family would forever more be looked after by the Rathores. It was a promise that has been honored and Rajiya's descendants continue to live in Raj Bagh, Rajiya's Garden, the estate bequeathed by Jodha.

Photo credit

Photo credit

Photo credit

Photo credit
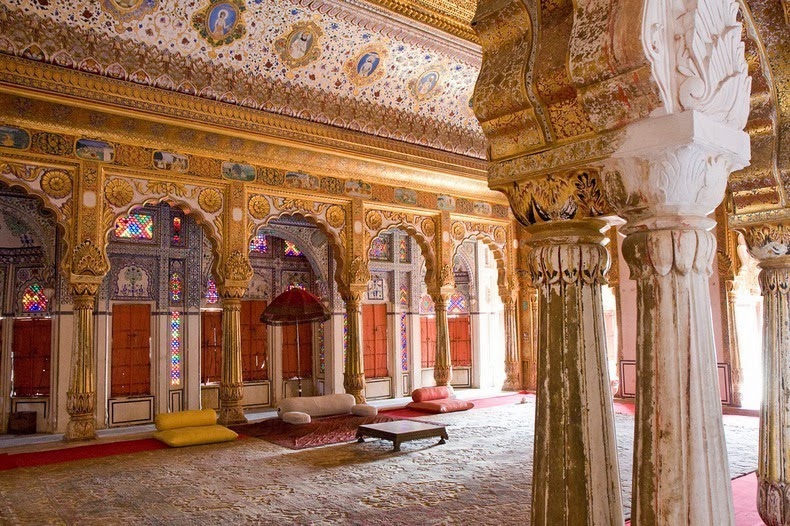
Photo credit

Photo credit

Photo credit

Photo credit

Photo credit

Photo credit

Photo credit

Photo credit

Photo credit

Photo credit
Source: Rajasthan Tourism India, Wikipedia
By Kaushik


